How To Change NAT Type PC [Complete Instructions]
Network Address Translation (NAT) handles the IP address mapping to a different address through the modification of the network address. Changing the NAT type might sound simple but some unseen and unsolvable issues might be encountered while doing so. This can happen due to many reasons the most prominent being “Limitations” placed by your ISP. Therefore, in this article, we wrote in detail on how to change Nat Type PC.
There are three types of NAT, namely Open, Moderate and Strict NAT. A Strict or even a Moderate NAT type might cause issues during gameplay. We will be guiding you through some easy methods to change your NAT type. The changes that you make in your Router’s Configuration will work out for all your other devices as well i-e XBOX, PS4 etc.
Method 1: Enable UPnP and Forward Ports
This is probably the most common and easy way out there to change your NAT type. I cannot define the exact method as every router has its own interface and options but i will explain what you must look for and what options to choose.
- Press “Windows + R” to launch into the Run prompt.
- Type in “cmd” and press “Shift + CTRL + Enter” to start in admin mode.
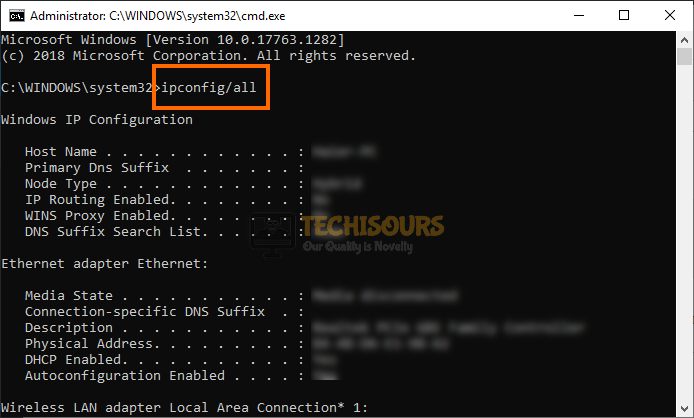
- From there, type in “ipconfig /all” and press “Enter” to display the internet information.

ipconfig/all - Now, under the “Default Gateway“ option, note down the IP address that is being displayed.
- Paste this address into your browser’s search bar and press “Enter” to launch into the Router’s login page.
- From there, enter in your “User Name” and “Password” both of which should be present on the back of your router or on the manual.
- After logging into the Router’s page, look for the “Port Forwarding” option that should be present somewhere in the Wifi settings.
- Now, enter in the port that the game or app requires you to open and forward it from that page.
- Make sure that you select the “UDP/TCP” option afterwards and restart your PC.
- Check to see if doing so enables you to change NAT Type PC.
- Also, if this doesn’t work, make sure to look for the “UPnP” or the “Universal Plug and Play” option and enable it on the router which should be somewhere around in the Advanced Settings.
- After enabling it, check to see if you are able to Change NAT Type PC.
Method 2: Reconfigure Router Configuration File
- Log into the Router’s administrator page as we have done in the method above.
- Go to the “Backup” setting or a similar setting from the admin page and select the “Save/Backup Configuration” file or a similar option to download the router’s configuration file.
- After that, the “Connection.ini” file should be downloaded to your computer. From here, right-click on this file and select the “Open With > Notepad” option.

Selecting the “Open With Notepad” option - Now, on a new line at the end of the last “bind” command inside this file, paste the following commands.
"bind application=CONE(UDP) port=3074-3075"

"bind application=CONE(UDP) port=3478-3479"

"bind application=CONE(UDP) port=3658"
- Now, instead of the ports that have been entered above, enter the ports that your game or application requires.
- Head back to the backup setting and this time, select the “Restore Configuration” option.
- Select the file that we edited and restore the router to that config.
- Now, make sure to restart the router and check to see if you have been able to change NAT type PC.

Method 3: Enable DMZ in your Router’s Settings
- Press “Window + R”, type in “cmd” and press “Ctrl + Shift + Enter” on your keyboard.

Typing in cmd - Type in “ipconfig” and press Enter.
- Note down the IP address displayed (Default Gateway).
- Go to your browser and enter that IP address in the address bar.
- Your Router homepage should open, the username and password can be found usually on the back of the router.
- Look for DMZ (Demilitarized Zone), enable it and enter your IP address in the section where it asks your IP address. (DMZ option is usually found in the Advanced Settings or Services).
- Check to see if you have now been able to Change NAT Type PC.

Method 4: Enable Network Discovery
Follow the steps below to enable Network Discovery in Windows:
- Press “Window + S”, type in “Manage advanced sharing settings” and press Enter on your keyboard.
- Under the “Network Discovery” category, select “Turn on network discovery” and tick the checkbox that says “Turn on automatic setup of network connected devices”.

Selecting the “Turn on Network Discovery” option - Press “Save Changes” and confirm it.
- Restart your PC and Router and see if NAT Type has been changed on the PC.

Method 5: Use VPN
It is possible in some cases to Change NAT Type PC simply by using a VPN connection to run the app/game instead of a normal one. This is because the NAT Type might be too strict on your internet connection and using a VPN to hide the site’s being accessed from your ISP might help in circumventing the restrictions.
Method 6: Disable DHCP on Router
- Log into the Router’s admin page as we have done in the first method above.
- Here, look for the “DHCP” option which is usually in the “WAN” section of the router settings.
- Make sure to disable this option on your router and ensure that the LAN ports of the modem and router are plugged in properly.
- If the issues still occur, you can call your ISP and ask them to assign you a static IP address which should get rid of certain network-related issues that you might encounter.
Method 7: Changing your IPv4 IP Address
- Press “Windows + R” to launch the Run prompt, type in “ncpa.cpl” and press “Enter”.

Typing in “ncpa.cpl” - Right-click on your internet connection and select “Properties” to launch into the properties of the internet connection.
- Double click on the “Internet Protocol Version 4 (TCP/IPV4)” option and check the “Use the Following IP Address” button.

Internet Protocol Version 4 (TCP/IPv4) - From here, make sure to type in the IP Address that we noted down from the “Default Gateway” option in the method above and you can change the last “Two” sections of the IP address because you are provided with the IP addresses in that range. For example, if it is “192.165.221.3”, you can select “192.165.225.2” and enter that.
- Click on “Apply” and then on “OK” to save your changes and check to see if the NAT type has been changed on your PC.


Method 8: Resetting your Firewall
- Press “Window + R”, type in “firewall.cpl” and press Enter on your keyboard.

Typing in “Control Firewall.cpl” in the Run prompt - Click “Restore defaults” from the options on the left and follow the on-screen instructions to complete the procedure.
- Restart your PC and see if you are able to Change NAT Type PC.

Method 9: Testing your Ports
Navigate to the Port Checker website, here, it detects your IP address and you can enter in a port number and click on the “Check” button to initiate a check as to whether that port is open or not. You can open these ports by following the method above if they are closed on your computer.
If the issue is still occurring, we recommend that you contact us for further troubleshooting.