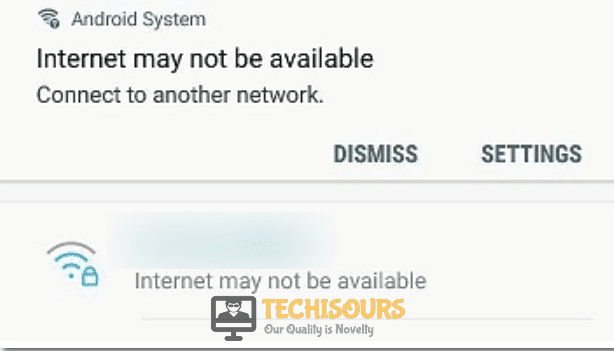
Fixed: Internet may not be Available on Android
The Internet has become a necessity for everyone in this era and almost every individual all around the globe is utilizing it for browsing important information etc. Unavailability of the internet can cause a delay in numerous important tasks and if this issue persists on someone’s system he/she is unable to meet important deadlines. Recently we’ve gone through tremendous user reports that illustrated the internet may not be available error message on their respective gadgets while they tried to browse anything. After doing deep research on this connectivity issue we decided to cater some relevant fixes that would be responsible for terminating this error from your system.

What causes the internet may not be available error message?
This particular issue was investigated by looking at various user’s reports. As it turns out there are several potential culprits that might end up triggering this problem and among them, the most common ones are indexed below:
- The smart network switching feature of your phone that is responsible for switching to the most reliable Network might be enabled.
- The DNS servers might be blocked by a specific website as it is responsible for establishing a connection with a website.
- The smartphone’s settings might be Outdated as some updates are necessary for maintaining a stable internet connection.
Pre-Tips:
If you encounter this error message on your smartphone, the first thing to do is to find out whether the issue is at your end or not. If the wifi is functioning properly on other gadgets then the fault might be with your phone. Hence, perform a Soft reset on your phone. It helps in flushing the RAM and resolving these types of glitches from your device.
- Press the power button and volume down button simultaneously for 10 seconds or more.
- Keep on pressing them until the screen turns black.
- Wait for a few seconds until the logo of your respective phone manufacturer appears on the screen and let your phone restart.
- Once the phone has undergone the Reset procedure, reconnect the phone to the desired network and check it if the issue still persists.
What you should do if you encounter the Internet may not be Available Error on your Android?
Solution 1: Assign Static IP to your device
Altering the DHCP mode can help in eliminating the error hence we would configure static IP for our device so that we could get rid of this issue:
- Locate the Settings option on your phone and launch it.
Tap on settings option - Now, tap on the Wireless and Networks option from the dropdown list and click on Wifi.
Choose Wireless and networks - Select and hold the desired network with whom you are trying to establish a connection.
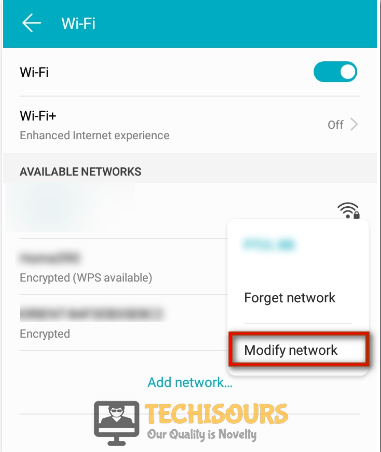
- Select the Modify Network button from the drop-down menu and click on the Show Advanced Options button for further options.
Choose modify network option - Tap on the IP address button and select the Static option.
Assign static IP - When using static IP addresses on home and other private networks, they should be chosen from within the standard private IP address ranges listed:
- 10.0.0.0 through 10.255.255.255
- 172.16.0.0 through 172.31.255.255
- 192.168.0.0 through 192.168.255.255
- Now enter the IP address and keep one thing in mind that this step is specific to each network. For Example: 192.168.1.128
- The Gateway should fill in automatically based on the IP address. If not, copy the IP address and replace the last number with a 1. (Based on the previous example: 192.168.1.1)
- Now, locate and select the DNS 1 option.
- Type in 8.8.8.8 as the first DNS address and then select DNS 2 option and type in 8.8.4.4 as the second one.
- Tap on the Save button in order to save the DNS addresses.
- Try to connect to the desired Wifi network and check whether the issue still persists.
Solution 2: Clear Cache Partition
Sometimes a certain application might comprise cache that can prevent the Wifi from connecting. In order to eliminate the error wiping the cache partition can help to get rid of this problem. In order to perform it follow the steps given below:
- Power Off your smartphone and press Volume up and Power button simultaneously for 10 secs or a bit more to enter into the Recovery mode. (Note: The combination of keys can vary for different models.)
- Press the Volume down button to navigate to the Wipe cache partition option.
Choose Wipe cache partition option - Wait until the process is completed and then Restart your smartphone.
- Launch the Youtube or any random web application now and check if the error still exists or not.
- If the error is still there then there is no need to panic and navigate to the Settings of your smartphone, select apps from there and then delete the unwanted apps. This will free up the Storage space in your smartphone and this error would also be rectified.
Solution 3: Reset Network Settings
Resetting the network settings of the smartphone has proven to be the most efficient remedy in this case hence without wasting a second let’s proceed towards resetting the Network settings so that this error is eliminated. Hence, for doing this perform the steps indexed below:
- Navigate to the Settings of your smartphone.
Choose Settings - Tap on the System option located in the settings of your smartphone and afterward choose the Reset button.
Click on the Reset button - Select Network settings Reset option from the reset window.
Choose network settings reset option - Tap on the Network settings reset button to confirm the action.
Confirm Reset - Wait until the Reset is complete and afterward connect your device to the desired network and check whether the error is rectified or not.
Solution 4: Update Your Smartphone.
Outdated software can sometimes cause the malfunctioning of the phone therefore in order to get rid of the internet may not be available wifi error message your smartphone needs to be updated. For updating your smartphone follow the steps indexed below:
- Tap Settings from the app drawer list to launch it.
Tap on settings - Tap on the system from the settings menu and select System update.
Click on system - Now, click on the check for updates button from the system updates window.
Check for updates - Wait until the checking process is completing and afterward click on the download button if the latest updates are available.
- Wait patiently until the updates are downloaded and installed.
- As soon as this process is complete connect to the desired network and check whether the error is still present or not.
Solution 5: Forget Wifi Network
Refreshing the wifi connections can prove to be beneficial because sometimes packet losses occur at the receiver end, therefore, forget the network you are currently connected to and try to reconnect. While reconnecting the internet pay special attention while entering your credentials and in order to do so perform the steps stated below:
- Tap Settings from the app drawer list to launch it.
Tap on settings - Now click on the Wireless and Networks button from the settings and choose Wifi.
Choose Wireless and networks - Select the desired network that you want to forget.
Choose forget network option - Reconnect to the network by entering your credentials and check whether the error still persists.
Solution 6: Reset your Smartphone
A factory reset is a feature that allows you to revert your phone settings to its original defaults. If you are still encountering the internet may not be available error, then reset your phone by following the steps given below and check whether the error is gone:
- Open the Settings of your smartphone and select Backup and Reset.
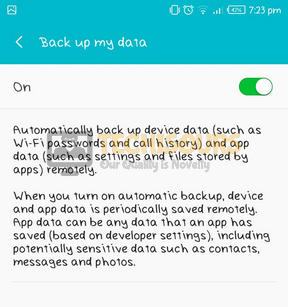
Click Backup & Reset - Navigate to Backup my data and tap on the toggle button to enable the backup option.
Backup your data - Now tap on Factory Data Reset and select Reset phone.
Click Factory Data Reset
Solution 7: Look for faulty Application
The faulty applications running in the background can cause the connectivity issue of the phone. This mode blocks the installed apps and enables only pre-installed apps like phone and message. If you get rid of this glitch after booting in safe mode that means that you have a faulty third-party app installed. Hence, to verify the presence of defected apps run the phone in the safe mode and connect to the network.
- Press the Power button for 10 seconds, until the Power off window shows up.
Choose the Power Off option - Press Power off until the Safe mode prompt appears.
- Tap on the Safe mode.
Boot in Safe mode - This process may take up to a few seconds, therefore, wait until the phone is restarted.
- Once restarted look for the Safe mode option on the lower-left side of the home screen.
- Afterward, try to connect to the desired wifi network and check whether it connects in the safe mode.
- If yes, then try to find the Application that is causing the trouble and delete it to get rid of this issue.
Solution 8: Set DNS to Automatic
Many users have reported that tweaking your DNS settings has proved to be an efficient remedy of the internet may not be available error. Therefore, follow the guide below to alter the DNS option on your smartphone:
- Tap Settings from the app drawer list to launch it.
- Now choose Network and internet option from the dropdown menu.
Choose Network and Internet - Click Advanced option from the window and locate the Private DNS option.
- Tap on the private DNS and check the button parallel to the Automatic option.
Select Automatic option - Now try to connect to the desired network and hopefully the error would have been gone by now.
Solution 9: Disable Smart network switch Feature
If you’re one of the many people who choose to use as little mobile data as possible in order to save money, Smart Network Switch is probably a downside. Since it doesn’t technically disconnect you from the Wi-Fi network, it still shows that there’s an active Wi-Fi connection, despite using mobile data. So, basically, you have no way of knowing when it’s using Wi-Fi or mobile data, and your usage can skyrocket resulting in the internet may not be available error on your display screen. It can be eliminated if this feature is disabled in your phone hence follow the steps stated below:
- Locate the Settings option from the app drawer list.
- Choose the Network and Internet option from the dropdown menu.
Choose Network and Internet - From the window choose the Wifi icon and afterward, you’ll observe a More option located at the top right of your screen.
- A dropdown window will appear in front of you and from there choose the Smart Network switch button.
Choose Smart Network Switch - This will bring up a dialog box with a short explanation of what Smart Network Switch does, along with two options: ON and OFF. Select the OFF option and the window would be automatically closed and hopefully, this potential fix would have resolved the issue.
Disable Smart Network Network switch


