Easily Fix Minecraft Failed to Write Core Dump Issue
The “Failed to Write Core Dump. Minidumps are not Enabled by Default on Client Versions of Windows” is mostly triggered while hosting or joining a Minecraft server and it is triggered mostly due to Java. Therefore, we suggest that you try out the fixes and solutions that we have listed in this article to fix the issue. Also, go through the reasons due to which the issues occur in the first place that we have listed below.

Why the Failed to Write Code Dump Issue is triggered?
After investigating the issue, we concluded that the following have to be the most crucial reasons due to which the Core Dump cannot be written on your computer.
- Outdated Java: If the Java installed on your system has been outdated, you will be getting the Failed to Write Core Dump issue with Minecraft and with Java as well. Therefore, we suggest that you try to make sure that the latest version of Java is being used on your computer as we have indicated in the steps below.
- Outdated Operating System: In certain cases, the outdated installation of Windows might not be able to run Minecraft properly. Therefore, we suggest that you try to update to the latest available version by following the steps that have been listed below.
- Memory Errors: Sometimes, memory-related errors might prevent the Core Dump from being written. Therefore, we suggest that you check your PC for any such errors and fix them using the utility available in the solution below.
Now that you have been familiarized with the reasons behind the error, you can finally start implementing the solutions for this issue.
Fixing the Failed to Write Core Dump Issue:
Fix 1: Updating Java to the latest version
- Press “Windows + R” to launch the Run prompt, type in “Control Panel” and press “Enter” to launch the control panel.

Typing in Control Panel - From there, click on “Programs” and select “Java” from the list.
- Once in the Java Control Panel, go to the “Java” tab and select “View”. After that, “Java Runtime Environment Settings” will appear. Ensure that the latest “Java Runtime” is Enabled. If not, then tick the checkbox below “Enabled” and press “OK”
- Restart your PC and see if the “Failed to Write Core Dump. Minidumps are not Enabled by Default on Client Versions of Windows issue” is now resolved

Fix 2: Checking for Windows Updates
- Press the “Window + S”, type in “Check for updates” and press Enter on your keyboard.
- Click on the “Check for updates” button, if updates are available, Windows will automatically download and install them.

Check for updates - If they are not automatically downloaded and installed, click “Download and install”.
- Restart your PC once the update is complete and see if the issue is resolved now.

Fix 3: Restarting your PC
This is the most simple way in which you might be able to fix this issue. A simple restart of the computer might get rid of any launch configuration issues that the PC might have acquired during the startup and fix this issue.
Fix 4: Enabling Small Memory Dump
- Press “Window + S”, type in “View advanced system settings” and press Enter on your keyboard.
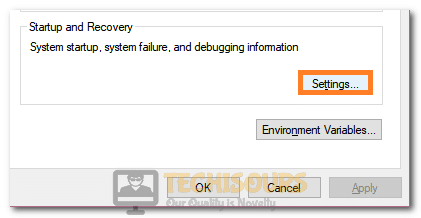
- In the “Advanced” tab, click on the “Settings” option under the “Startup and Recovery” tab.

Selecting Startup and Recovery Settings - Under the “Write debugging information” tab, select the “Small memory dump” option and press “OK”.
- Restart your PC and see if the Failed to Write Core Dump issue is resolved.
Fix 5: Updating Graphics Drivers
It is possible in some cases that the GPU drivers that your computer is using have been outdated due to which you are running into this particular issue. Therefore, we strongly suggest that you try to update the GPU drivers installed on your computer by downloading them through the Nvidia Geforce Experience or the AMD Catalyst software depending upon your GPU.
Fix 6: Deleting the .metadata Folder
Head on over to the “C:\Users\(user)\Documents\workspace\.metadata” folder which contains your Project References. Make sure to delete the “.metadata” folder and import the current projects to your workspace. After doing so, check to see if the Failed to Write Core Dump issue is resolved.
Fix 7: Reverting to a Previous Version of JDK
- Press “Window + S”, type in “Apps & features” and press Enter on your keyboard.
- Look for the “Java” app here, click on it and select “Uninstall”.
- Once uninstalled, Go to Java’s official website, and download the desired version of Java.
- Install it, restart your PC, and see if the issue is resolved now.
Fix 8: Change GPU Configuration (Nvidia GPUs Only)
- Right-click on Desktop and select “Nvidia Control Panel”.
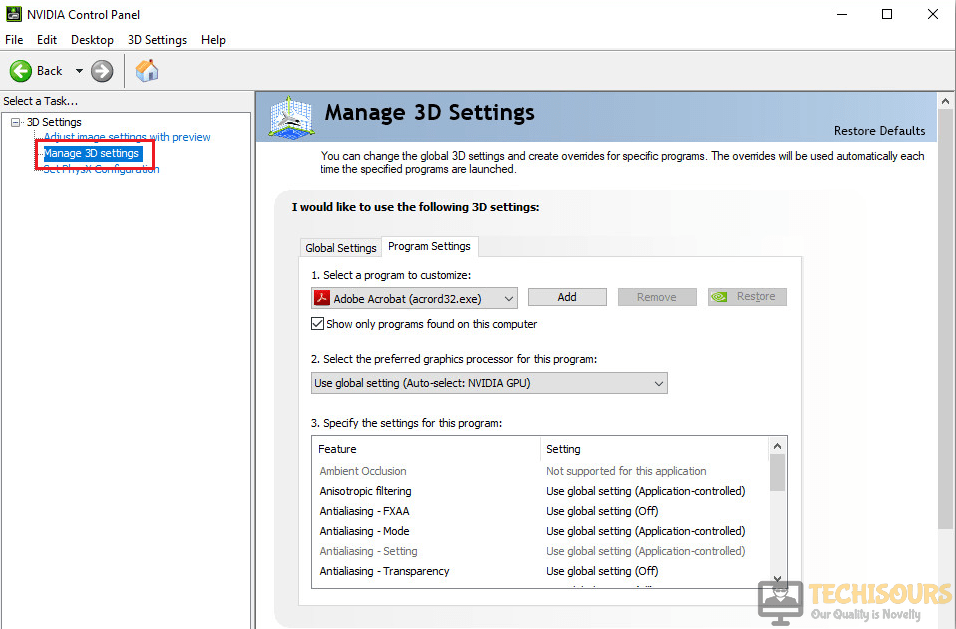
- Once the Control Panel opens, head over to “Manage 3D Settings” under the “3D Settings” category.

Manage 3D Settings - Click “Program Settings”, click “Add” and select “Browse”.
- Navigate to the following path: C:/Program Files/Java/jre7/bin/.
- Select “Java” which should have the logo of JAVA.
- Once added, look for the following settings and change them accordingly:.
Triple Buffering – On

Vertical Sync – On
- Check to see if making these changes resolve the Failed to Write Core Dump issue.
Fix 9: Running the Game as Administrator
- Go to Minecraft’s Install folder and look for the launcher.
- Right-click on it and select “Properties”.
- In the “Compatibility” tab, tick the option “Run this program as an administrator” and press “Apply” followed by “OK”.

Run this program as an administrator - Launch the game and see if the Failed to Write Core Dump issue is resolved now.

Fix 10: Clean Installing AMD Catalyst (AMD GPUs Only)
- Press “Window + S”, type in “Apps & features” and press Enter on your keyboard.

Selecting Apps & Features - Look for “AMD Software” from the list of programs and click on it.
- Select “Uninstall” and follow the on-screen instruction to complete the process.
- Once complete restart your PC and visit AMD’s website to download the latest drivers.
- Install these drivers and restart your PC and check to see if the issue is resolved now.

Fix 11: Creating Dump File for Minecraft
- Launch Minecraft.
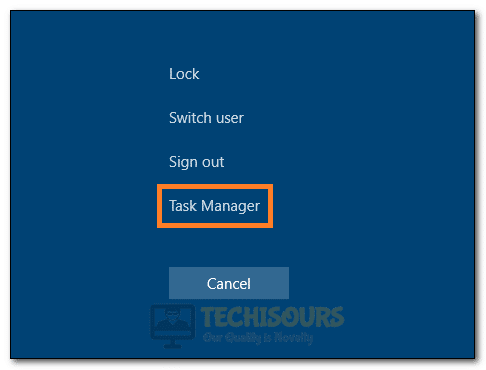
- Press “Ctrl + Shift + Esc” to open the Task Manager.

Launching Task Manager - In the “Processes” tab, look for “Minecraft Launcher” and right-click it.
- Select “Create Dump File” from the menu and wait for the process to finish.
- Restart your PC and see if the issue has now been resolved.
Fix 12: Reverting to Vanilla Version
If you are using mods in Minecraft, that can probably cause issues as well. Try reverting to the Vanilla (Base) version of the game which might resolve your issue.
Fix 13: Enabling Core/Mini Dumps Manually
For JDK 9 and above follow the steps below:
- Press “Window + S”, type in “java” and right-click the best match that pops up.
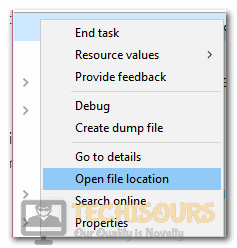
- Select “Open File Location”, right-click “java” and click “Create shortcut”.

Selecting the “Open File Location” button - Java should now appear on desktop, right-click it, and select “Properties”.
- In the “Target” text box, write the following command at the end:
java -jar crasher.jar -XX:+CreateCoredumpOnCrash
- Press “Apply” and “OK”
For JDK 8, the rest of the process will be identical except the command added in step 4, which will be replaced with the following command:
java -jar crasher.jar -XX:+CreateMinidumpOnCrash
On Unix, Linus and macOS you need to use the following commands to enable minidumps:
ulimit -c unlimited

java -jar crasher.jar -XX:+CreateCoredumpOnCrash
Moreover, you can enter the following command in the terminal:
defaults write com.apple.finder AppleShowAllFiles TRUE
Fix 14: Modifying Minecraft’s Files
- Right-click the Minecraft shortcut on your Desktop and click “Open file location”.
- Click on “.minecraft” from the address path and open the “options” file.
- Look for “fboEnable” and change its value to “false” instead of “true”.
- Save the file and close it.
- Launch the game and make sure your profile name and username are similar and check if the issue is now resolved.
Fix 15: Uninstall/Reinstall any recently Installed Software
- Press “Windows + R” to launch into the Run prompt.
- Type in “Appwiz.cpl” and press “Enter” to launch into the application management window.

Typing in “Appwiz.cpl” and pressing “Enter” - From here, right-click on any recently installed software and select “Uninstall” to remove it from your computer.
- Check to see if doing so fixes the “Failed to Write Core Dump. Minidumps are not Enabled by Default on Client Versions of Windows” error on the game.

Fix 16: Reinstalling the game
- Press “Windows + R” to launch into the Run prompt.
- Type in “Appwiz.cpl” and press “Enter” to launch into the application management window.
Typing in “Appwiz.cpl” and pressing “Enter” - Right-click on “Minecraft” and select the “Uninstall” button to remove it from your computer.
- Now, download the game again from their website and check to see if doing so fixes the issue.
Fix 17: Checking for Memory Errors
- Download the app from here.
- Move its data into an empty USB Flash Drive and restart your PC.
- Head over to the BIOS and in the “Boot Priority” select the USB Flash Drive as the first to take the boot from.
- Now restart your PC again and you should now see the MemTest utility.
- Run the default memory test and wait for it.
- Look for errors such as “bad memory” or “High CPU overclock” or “Wrong memory voltage” all of these can cause issues. However, “Bad memory” basically means the RAM has issues and will need replacing.
If all of these fixes are unable to eradicate the issue for you, contact us for further troubleshooting of the issue.