How to Fix Case Fan not Spinning Issue [Complete Guide]
We have recently gotten a lot of queries from users that are complaining about the PC Case Fan not Spinning Issue. If your Front Case Fan, Rear Case Fan, CPU Fan, or any other fan installed inside the PC isn’t spinning, this guide should be a great starting point to figure out exactly what is going wrong with your PC.
In this article, we will address the front case fan not spinning issue and will also try to solve the rear case fan not spinning issue and will also try to address it in such a way as to fix any fan issues in your PC. Make sure to also read the reasons due to which this issue is usually triggered.
What Prevents the PC Case Fan from Spinning Properly?
If your case fan isn’t working properly, the following should be the most common reasons due to which this is happening.
- Improper Startup: If your computer hasn’t started properly, some fans on the case might not run because they haven’t been provided the ample current needed to start. Therefore, the PC case fan not spinning issue will be triggered.
- Dirty/Clogged Fan: If you are running into the Front case fan not spinning or the Rear case fan not spinning issue, it is possible that they have been collecting dust for a while and need to be cleaned because they are clogged. This is actually very common because these are the positions where fans acquire the most dust and without a filter, they are likely to become clogged every few months or so depending upon your setup.
- Bios Issue: If the Bios on the computer has failed to recognize or supply current to the fans that have been connected, you will run into this issue. It is best to try and reset the Bios and check to see if by doing so, you are able to get the case fan running again.
- Hardware Fault: If the Fan itself has been damaged or exposed to moisture, it is unlikely that it will work again. Since these fans aren’t that expensive and can easily be replaced with third-party ones, it is recommended that you try and replace them to fix this particular issue.
- Disconnection Issue: All case fans are connected with the motherboard with mostly a four-pin or two-pin configuration which then draws power from the PSU, Some fans are connected with the PSU directly and require a Four-Pin connection. Therefore, it is best that you analyze the wires coming into and going from the Fans and follow them along and ensure that they are connected in the appropriate slots in the motherboard or the PSU.
- Circuit Issue: It is possible that the Circuit on your motherboard that is responsible for supplying power to the CPU fan or any other fan inside the case has been fried or short due to which the pc case fan isn’t spinning. In this situation, a motherboard/circuit repair or replacement should be the way to go.
Now that you have been made familiar with most of the reasons behind this issue, we can finally move on towards fixing this issue.
Fixing the PC Case Fan Not Spinning Error:
Before you Start:
- CPU Fan not Spinning: If the CPU fan isn’t spinning, it is likely that it has been disconnected, check to see if its cable is connected to the four pins near the CPU slot on the motherboard. This needs to be connected in order for it to run and without it, the temperature of the CPU will very hot because most CPUs cannot work even on moderate loads without a Fan. Check and verify that this is working to ensure that the CPU Fan works properly.
- Check Power: Ensure that the PSU that you are using hasn’t gone old or bad due to which it might not be supplying ample current to the motherboard and due to this, the CPU Case fan not spinning error might be triggered.
Initial Troubleshooting Steps:
- Checking Fan Header: Basically, there are a couple of fan headers available on most modern motherboards and these can supply the ample current required by the fans. However, in your case, it is possible that one of these headers has been rendered non-functional due to a power failure or any other reason. Therefore, the logical thing to do before we start would be to examine if the fan header is working correctly. For this purpose, we recommend that you unscrew the PC case and remove it. After that, follow along with the wire connecting your FAN to your motherboard, it should be going straight into a fan header. Remove this PIN from the Fan header and now your FAN will be disconnected, install this PIN into another fan header on the Motherboard, they should be available along the sides of the board, and check if the FAN powers up along with the PC. If it does, it most likely means a faulty Fan Header is the reason due to which your PC Case fan not spinning issue is being triggered.
- Voltage Monitoring: Another trick that can be employed to check if the PSU is working correctly, is to check whether correct Voltage is being supplied by the PSU to the FAN or by the Motherboard to the FAN. Therefore, depending upon your configuration, get ahold of a Volt Meter and monitor the Wire connecting the Fan to the PSU or the motherboard and check to see what amount of Voltage it is getting. There are two values that are generally consumed by most fans on the market, those values are “3-5V” or “12V”. If your PC isn’t getting these values, it is most likely the case that your PSU or Fan is faulty, if there aren’t any issues with any other component installed with the computer, the issue can be isolated to the Fan itself because it isn’t able to draw the ample power required to power itself.
- Performing Diagnostics Test: The most specific and perhaps the most convenient test that we can do to check the working of the Fan is to perform a startup diagnostic that is capable of identifying if the devices connected to your motherboard are actually functioning properly. In order to do this, completely power off your computer, remove the power cable connected to your CPU, and press and hold the “Power” button to drain all the current from its components, after this, reconnect the power cable and upon startup, immediately press the “F12” key to get into the boot options screen. Once on this screen, using the arrow buttons to move the highlight cursor, highlight the “Diagnostics” option, and press “Enter” to run a diagnostics scan.Once this diagnostic scan has been completed, the computer will ask you if you want to run a memory test, make sure to select no in this screen because we don’t need to do that. After this, a 32-bit scan will start running, from the screen, if given the option, select the “Custom Test” option and from here, select “CPU Fan” as a specific device. Now, after the scan is finished, if you get an error that states “Error code 2000-0511 Validation 13133″, this means that the Fan has gone bad and your Motherboard is unable to detect it, try installing this fan in another system if you want to be a 100% sure but it most likely needs to be replaced.
Solution 1: Power Cycle your Computer
The velocity with which the Fans installed in your system run depends totally upon their Torque, this comes pre-determined from the factory and adjusting with the requirements, this Torque can be increased or decreased by the system. However, there is only a specific amount to which it can go.
The CPU fan runs at a comparatively low torque and therefore it can get blocked if touched by a finger or any other debris that might have fallen into it. If the fan has been blocked in one run-cycle in such a way, it doesn’t start back up when the debris is removed unless the computer itself is restarted. Therefore, in this step, we will be completely power-cycling our computer to ensure that this is not the case.
- Shut down your computer completely and remove the power cables from the CPU.
- Press and hold the CPU power button for at least 30 seconds to get rid of all static electricity.
- Release the button once the time passes and reconnect the power cable.
- Press the CPU button to turn on the computer and check to see if you are able to fix the case fan not spinning issue.
Solution 2: Clearing Debris and Dust with Compressed Air
It is possible that your CPU fan has been sitting and acquiring dust for a long time and you haven’t cleaned it up in a while. Due to this, the fan might get blocked due to debris and dirt and it will prevent it from being able to run. Therefore, this might cause the CPU fan not spinning issue and it becomes really difficult to clean it as it involves completely removing this fan and cleaning it yourself. Alternatively, a can of compressed air can do it for you.
Basically, as the name suggests, it can be aimed at the CPU Fan, inside the vents beneath the fan that might be dirty and pressed to clear the debris, dirt, lint, and any other things that might have been clogged up in there. This way, after thoroughly clearing all the debris from the fan and its vents, you can install it back in if it was removed and power up the computer to check if it works.

Solution 3: Remove Debris from the Fans
If the CPU or a case fan installed on your computer doesn’t have high torque, it can be blocked by any debris that might prevent it from spinning properly. Therefore, it is recommended to completely remove the PC case and try to run the computer while examining carefully if any wire or debris is blocking the fan from running. If that is the case, remove this wire or debris and then restart your computer and now the case fan not spinning issue should be resolved.
Solution 4: Reset/Flash your BIOS
Bios is responsible for controlling and powering all the devices connected to your motherboard and is, therefore, an integral part of running the fans connected to your case and your PSU. It is therefore important that it is functioning correctly and if misconfigured, it can cause the PC case fan not spinning issue. Therefore, in the steps below, we have mentioned the way to completely reset your Bios to the default settings.
- Power down your computer completely by click on the start menu icon, selecting “Power” and then selecting “Shut Down”.
- After the PC is shut down, press the “Power” button to turn it on and then press the “F2” or the “Del” button upon startup to enter into the Bios Setup.
- After this, press the “F9” key to select the “Load the setup defaults” option or if there is any other button to select that specific option, click on that button.

Clicking on the “Load Setup Defaults” option - After this, make sure to press the key that highlights the “Save and Exit” option.
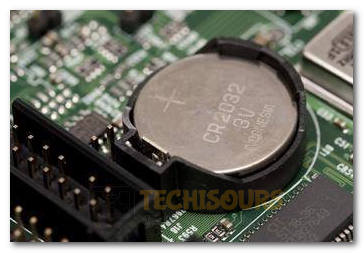
- Alternatively, you can also remove the CMOS battery from the motherboard and reset the Bios in this way by pressing and holding the power button for at least 30 seconds while the battery is removed and then install it back and start up the PC.

removing CMOS Battery

Solution 5: Replace the Fan
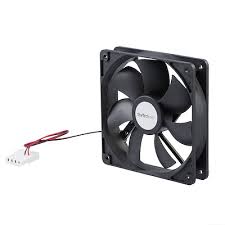
As mentioned in the Initial troubleshooting steps, it is completely possible that the Fan itself has been wired incorrectly or it has been shorted due to which it might not be getting the ample current required to power itself. Therefore, a good step would be to check this fan out in any other computer and after ensuring that it has been damaged, replace it with another one. PC case fans are generally cheap and don’t require you to loosen your wallet a lot so if you are seeing high temperature inside your case, it really isn’t a bad investment to get a new case fan.
Solution 6: Examine and Replace the Motherboard.
Now, if you have concluded that the Case fan or the CPU fan is in fact working on another computer, this might spell out greater trouble for you because this can mean that the Motherboard that you are using is faulty and is either partially or completely damaged. To establish the fact that your motherboard might require a replacement, you need to check your Case fan with another computer and check if it is working there and if it does, you have to check your PSU (Power Supply Unit) with another computer and check if everything works fine.
If both of these options have been checked and if you have established that your Motherboard in fact might be faulty, you will have to replace the motherboard to get the fan back to working again. Once the motherboard has been replaced, check to see if the Pc case fan not spinning issue has been resolved.
Solution 7: Examine and Replace the PSU
As mentioned in the solutions above, we will have to use the law of deduction to summarize if our PSU actually needs replacement before you go on towards buying a new one.
First of all, check if the Motherboard works normally with another PSU that you can find in any other computer in your house or you can ask a friend to check it for you temporarily because this step is very important. If the motherboard is working fine with another PSU, the first step towards concluding that our PSU needs replacing has been completed.
Secondly, Install the case fan into another computer and check to see if it works fine over there. If it does, it can therefore be concluded that your PSU is faulty and isn’t supplying ample current to your components due to which some of them aren’t working. You can try to get a new one and install it in your case to fix the Case fan not spinning issue.
Another indicator of a faulty PSU is the beeping sound that your computer might make while trying to power it on as this indicates that some of the components connected to the PSU aren’t getting ample current. If this is also happening along with the case fan not spinning issue, it is a sure shot bet that the PSU has gone bad.
If the issue still hasn’t been fixed, try to contact an expert or contact us and we can try to further help you with this.