Easily Fix Windows Update Error 0x8007042b [Complete Guide]
The Error 0x8007042b during installation of the Windows update is usually triggered due to a misconfiguration in the update files or corrupted files. In addition to that, there might be a third party antivirus or an app that is blocking the update process. In this article, we have listed a detailed guide filled with solutions to completely fix the issue on your computer.

What Causes the Error 0x8007042B during Windows Update?
After reading the user complaints regarding this issue, we came to the conclusion that the following must be the primary reasons due to which the error is triggered.
- Antivirus: If the Antivirus installed on your computer is glitching out and blocking certain aspects of the update from being installed on the computer, we recommend that you completely remove the Antivirus from your computer and apply the update.
- Windows Services: Some Windows Services related to the Windows Update can be glitched or blocked due to which the update process might not proceed smoothly. Therefore, we suggest that you try to refresh these services and check to see if doing so fixes the 0x8007042b – 0x4000d issue.
- Disk Corruption: Sometimes the Disk on which Windows has been installed might have acquired some bad sectors or it might be glitched due to which the Error 0x8007042b might occur on your computer. Therefore, we suggest that you try to check for Disk Corruption and fix it.
- Windows Update Components: In certain cases, the Windows update components might have been glitched or the folder in which the update is downloaded might have been corrupted. A simple alternative to this is completely refreshing the folder and the components as mentioned below.
Now that you have been taken through most of the reasons behind the issue, you can finally start implementing the solutions.
Fixing the Error 0x8007042B on your Computer:
Solution 1: Uninstall the 3rd Party Antivirus
The error can sometimes be caused if the Antivirus installed on the system is preventing the update from being installed. This can be due to Avast, AVG, Kaspersky, Malwarebytes or any other antivirus software. In order to remove the software:
- Press “Windows + R” to launch Run, type in “Appwiz.cpl” and press “Enter” to launch into the application wizard.

Typing in “Appwiz.cpl” in the Run box. - In here, right-click on the Antivirus application installed on your computer and select the “Uninstall/Change” button.

Select “Uninstall” - From the next window, follow the on-screen instructions to completely remove the Antivirus from your computer and check to see if the 0x8007042b error is fixed.


Solution 2: Refreshing BITS Service
- Press “Windows + R” to launch the Run prompt, type in “Services.msc” and press “Enter” to launch into the service management window.

Typing in “services.msc” - From here, locate the Background Intelligent Transfer Service and right-click on it.
- Select the “Properties” option from the menu and click on the “Startup Type” dropdown and select “Automatic (Delayed)” from it.

Changing Startup type Automatic - After this, click on the “Stop” button to stop the service and press “Start” to start it back up again after 5 seconds.
- Click on “Apply” and then on “OK” to save your changes and check to see if the 0x8007042b error is resolved.


Solution 3: Run DISM and SFC Scan
- Press “Windows + R” to launch into the Run prompt, type in “cmd” and press “Shift + CTRL + Enter” to launch with admin permissions.

Typing in cmd - From here, type in the following commands one by one and press “enter” to execute them on your computer.
DISM.exe /Online /Cleanup-image /Restorehealth

sfc /scannow
- Check to see if doing so fixes the 0x8007042b error.

Solution 4: Reset Windows Update Components
- Press “Windows + R” to start the Run prompt, type in “cmd” and then press the “Shift + CTRL + Enter” keys on your keyboard to launch in administrative mode.
Typing in cmd - From there, type in the following commands one by one and press “Enter” after each to execute them on the computer.
net stop wuauserv

net stop cryptSvc

net stop bits

net stop msiserver

ren C:\Windows\SoftwareDistribution SoftwareDistribution.old

ren C:\Windows\System32\catroot2 catroot2.old

net start wuauserv

net start cryptSvc

net start bits

net start msiserver
- After executing these commands, restart your computer and check to see if the Windows Update Error 0x8007042b is fixed.
Solution 5: Installing Windows Updates
- Press “Windows + I” to launch into the settings, click on the “Update & Security” option and select the “Windows Update” button from the left side.
- From there, click on the “Check for Updates” button and let Windows complete the checking process for any missing updates.

Check For Updates - From here, make sure to select the “Download and Install” button if there are any updates available.
- Check to see if doing so has fixed the issue.

Solution 6: Remove Extra Peripherals
In some cases, it is possible that you have attached some extra peripherals to the computer which is preventing it from being able to properly update your computer. Therefore, we recommend that you try to remove the extra peripherals and check to see if doing so fixes the 0x8007042b error.
Solution 7: Clear out Recent Items List
- Press “Windows + E” to launch the File Explorer and from the left side, click on the “Quick Access” option.
- Now, from the list of “Recent Items”, press the left-click button on the mouse and drag to select all the items.
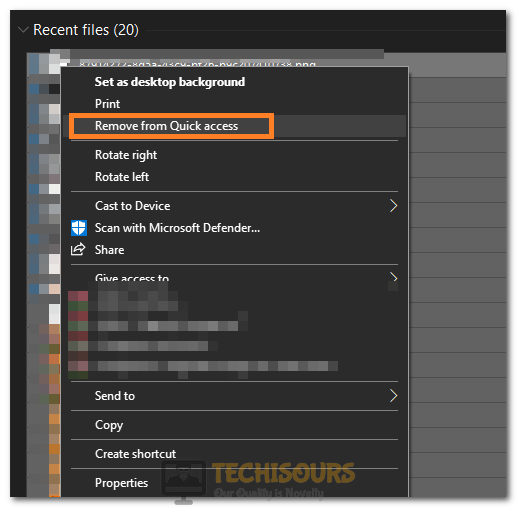
- Right-click on the selected items and click on the “Remove from Quick Access” option.

Selecting Remove from Quick Access
Solution 8: Perform System Restore
- Press “Windows + R” to start the Run app, type in “rstrui.exe” and press the “Enter” key to start the Windows Restore service
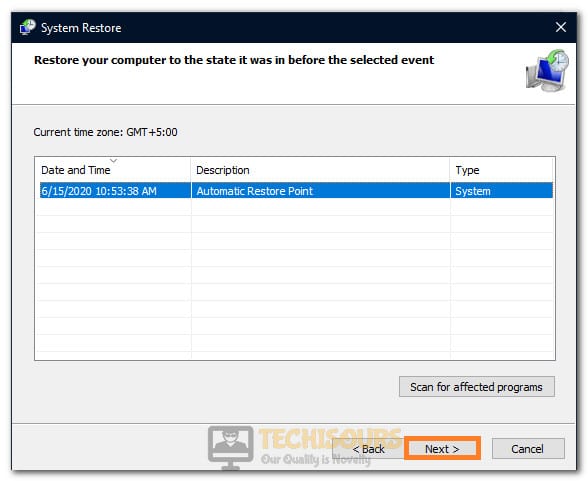
- On the next window, select “Choose a Different Restore Point” and click on “Next”.

Selecting the Restore Point - From the list, select the Restore point that is before the date on which the 0x8007042b issue started.
- Click on “Next” and follow through with the on-screen instructions to completely restore your computer.
- Check to see if doing so fixes the 0x8007042b error.
Solution 9: Install Update using Media Creation Tool
- Download the Windows Media Creation Tool from the Microsoft official site, once downloaded copy the file to a USB flash drive.
- After that, run the downloaded executable and select the “Upgrade this PC Now” option.

Upgrade this PC now - From the next screen, click on the “Download and Install Updates” button and select “Next”.
- Wait for the updates to be downloaded and from the “Choose what to Keep” option, make sure that the “Keep Personal Files and Apps” is selected.
- Now, proceed with the on-screen instructions to install the updates on your computer.

Solution 10: Clear Windows Update Cache
- Press “Windows + R” to launch Run, type in the following address and press “enter”.
%windir%\SoftwareDistribution\DataStore
- Press “CTRL + A” to select all the files in this folder and select the “Shift + Delete” buttons on the keyboard.
- Check to see if removing the cache fixes the 0x8007042b error.
Solution 11: Refresh Windows Update Service
- Press “Windows + R” to launch the Run prompt, type in “services.msc” and press “enter” to launch into the service management window.
Typing in “services.msc” - From there, right-click on the “Windows Update” service and select “Properties” from the dropdown menu.
- Click on the “General” tab and select the “Stop” button to stop the service.
- After waiting for a while, click on the “Start” button to start the service back up.
- Click on “OK” to exit out of the Window.
- Check to see if doing so fixes the 0x8007042b error.
Solution 12: Clearing Update Download Location
- Press “Windows + R” to launch Run, type in “Regedit” and press “Enter” to launch into the registry editor.
- From here, navigate through to the following address.
HKEY_LOCAL_MACHINE\SOFTWARE\Policies\Microsoft\Windows\WindowsUpdate
- From the right side, click on the “WUServer” and the “WIStatusServer” option and select the “Delete” button to remove them from the computer.
Solution 13: Rename your CBL Log
- Press “Windows + R” to launch into the Run prompt, type in the following address and press “Enter” to navigate to the address.
%systemroot%\Logs\CBS
- In here, try to rename the CBS.log to something else and try to update your Windows.
- If you are unable to rename the log file, press “Windows + R“, type in “services.msc” and press “Enter”.
Typing in “services.msc” - From the services window, right-click on the “Windows Modules Installer” option and select “Properties”.
- Click on the “Startup Type” dropdown and select “Manual”.
Changing Startup type to Manual - Click on “Apply” to save your changes and “OK” to exit out of the window.
- From here, restart your computer and try to rename the file again and check to see if the 0x8007042b error is fixed.
Solution 14: Troubleshoot Windows Update
- Press “Windows + I” to launch settings, click on the “Troubleshoot” option and select “Additional Troubleshooters” from the left side.

Clicking on Additional Troubleshooters - From here, click on the “Windows Update“ button and click on the “Run the Troubleshooter” button.
- Wait for the troubleshooting process to be completed and check to see if the issue is fixed.

Solution 15: Try Updating in Safe Mode
- Press “Windows + R” to launch the RUN prompt, type in “msconfig” and press “Enter” to launch into the ms configuration panel.

Typing in “Msconfig” - From here, click on the “General” tab from above and ensure that you check the “Selective Startup” option.
- After that, ensure that only the “Load System Services” option is checked and the rest are unchecked.
- After doing that, click on the “Services” tab and from there, check the “Hide all Microsoft Services” option and then click on the “Disable All” button.

Hide All Microsoft Services - Click on “Apply” to save your changes and “OK” to close out of the Window.
- Restart your computer and it will be booted into the safe mode.
- In this mode, try to install the update and check to see if doing so fixes the error while updating.
- Undo all the changes that we made after updating and restart the computer to boot out of the Safe mode.


Solution 16: Perform Clean Install
It is possible in some cases that the Windows Installation might have been corrupted due to which this particular issue is being triggered. Therefore, we recommend that you try to perform a clean install and then check to see if that fixes the 0x8007042b error.
Solution 17: Contact Microsoft Support
Sometimes the Microsoft Support might be able to troubleshoot the issue for you if it is being triggered due to a known glitch or fault. Therefore, contacting them might be the solution to this issue.
If all else fails, try contacting us for further troubleshooting.