Easily Fix OBS not Recording Audio Issue
We have gotten some complaints about the OBS not recording audio from capture card issue and we have gotten into fixing it in this article. Make sure to follow all the solutions one by one and read through the reasons due to which it is triggered in the first place.

In most cases, the issue is triggered due to some misconfigured settings or due to conflicting software and we will be able to pinpoint the issue when we move further with the troubleshooting process.
What Causes the OBS not recording audio Issue?
After going through some user-defined solutions, we concluded that the following are the most prominent reasons due to which the error is triggered.
- Audio Settings: It is possible that some audio settings for OBS have not been configured properly due to which you are running into the OBS not recording audio issue. Therefore, we recommend that you follow the solutions below in order to be able to properly record the audio.
- Audio Device Selection: If you haven’t selected the appropriate device in your settings, we strongly suggest that you select it and then check to see if doing so fixes this issue with OBS. If the proper device isn’t selected, it prevents the app from being able to recognize which audio device it should be recording the audio from.
- Muted Application: If the OBS app has been muted, you will run into this error while trying to record its audio. Therefore, we recommend that you check Windows Settings to ensure that the OBS app hasn’t been muted from the settings.
- Driver Issue: If the Audio driver that you are using isn’t installed properly or if it has malfunctioned, OBS will be unable to record your audio. Therefore, if you are running into the OBS not recording audio issue, a good place to start would be the Audio drivers.
- Enhancements not Set: If the Enhancement settings of the device aren’t set properly as mentioned in the solution below, you will run into this error message while trying to record Audio on OBS. Therefore, we recommend that you try and set the enhancements properly.
- OBS Studio Installation: It is also recommended that you try to reinstall the OBS application because sometimes its installation might be corrupted due to which the error message might be seen.
Now that you have been taken through almost all the possible reasons behind its occurrence, we can finally move on towards the deployment of the solutions.
Fixing the OBS not recording audio from capture card problem:
Solution 1: Check Your OBS Audio Settings
The first thing you need to check for is your OBS audio settings. For this, you can follow the below-mentioned procedure:
- Launch “OBS” on your computer and click on “Settings” at the bottom right of the window.
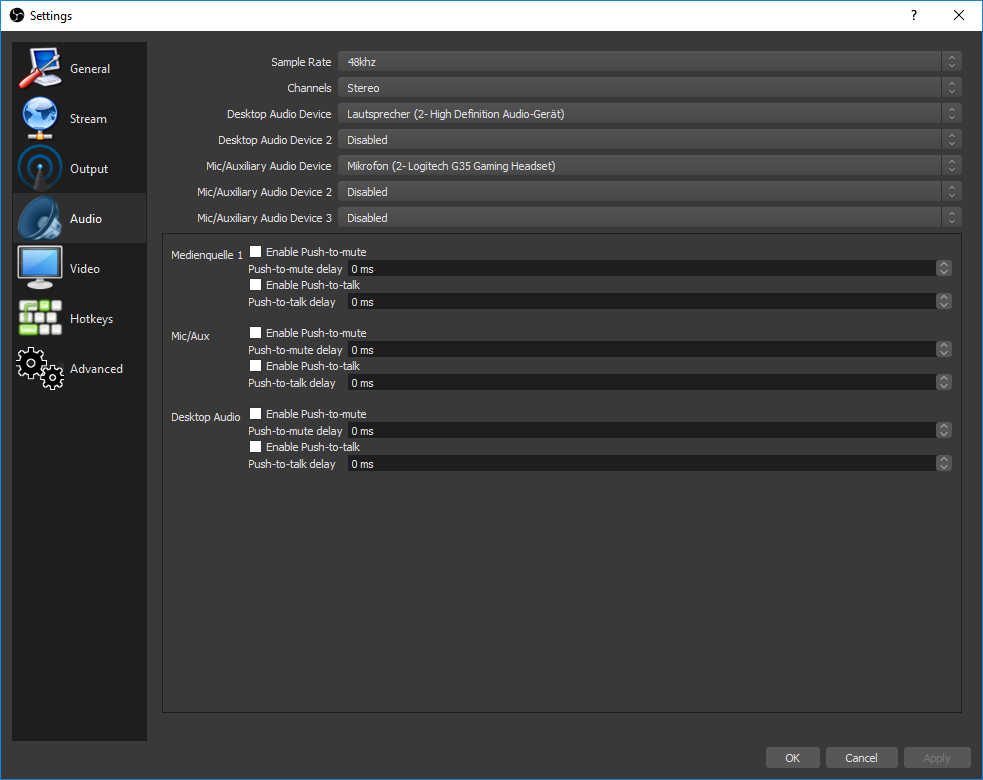
- In the Settings menu select “Audio” from the left tab and then select the “Desktop Audio Device” that you want OBS to use from the drop-down menu.

Choose the Desktop Audio Device Option - Then click on the “Microphone/Auxiliary Audio Device” drop-down menu and choose the “Device” you want.
- Apply all the changes made and press the “OK” button at the end and check to see if you encounter the obs not recording audio 2020 error message or not.
Solution 2: Set the Speakers As Default Audio Device
You can set your speakers as the default device for your audio using the following method:
- Right-click on the “Speaker icon” on your “Taskbar” and from the drop-up menu choose to select “Sounds”.
- In the new pop-up window click on the “Playback” tab and then click on the “Speaker” you want to set as the default.
- With the speaker selected click on the “Set Default” button beside “Properties”.

Select Speaker as Default Device - Once done “Apply” all the changes made, click on “OK” and check whether obs won’t record audio problem is rectified.

Solution 3: Adjust the OBS Encoding Settings
Some users were able to solve the issue after adjusting their OBS encoding settings. To do so proceed with these steps:
- Launch your “OBS application” and open the “Settings” menu from the bottom right of the window.
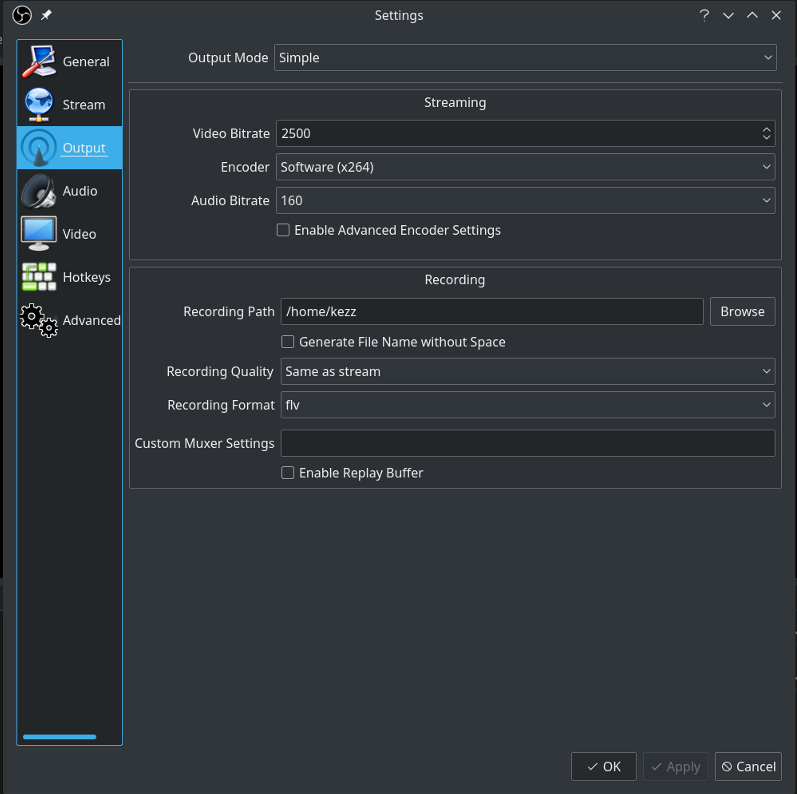
- Then click on the “Output” option from the left bar and in the “Audio Encoding” section choose to select “128” from the drop-down menu for “Bitrate”.

Setting the BitRate - In the “Video Encoding” section type in “3500” in front of the “Max Bitrate” box.
- Next, uncheck the box for “Use CBR”, apply all the changes made and hit the “OK” button.
- Then check to see if the obs not recording audio from mic error got fixed or not.

Solution 4: Check Whether OBS is Muted
- Launch the “OBS application” on your computer and then right-click on the “Speaker icon” on your “Taskbar”.
- From the drop-up menu choose to select “Open Volume Mixer” and then check if the speaker icon for “OBS” isn’t muted.
- If it’s muted click on the “Muted Speaker” icon to “Unmute” it and check if the error got resolved.
Solution 5: Uninstall Nahimic
Software like Nahimic can interfere with the OBS audio, therefore follow the steps below to uninstall nahimic from your computer:
- Open up the “Apps & Features” window by typing in Apps and Features in the Cortana search bar near the Start menu.
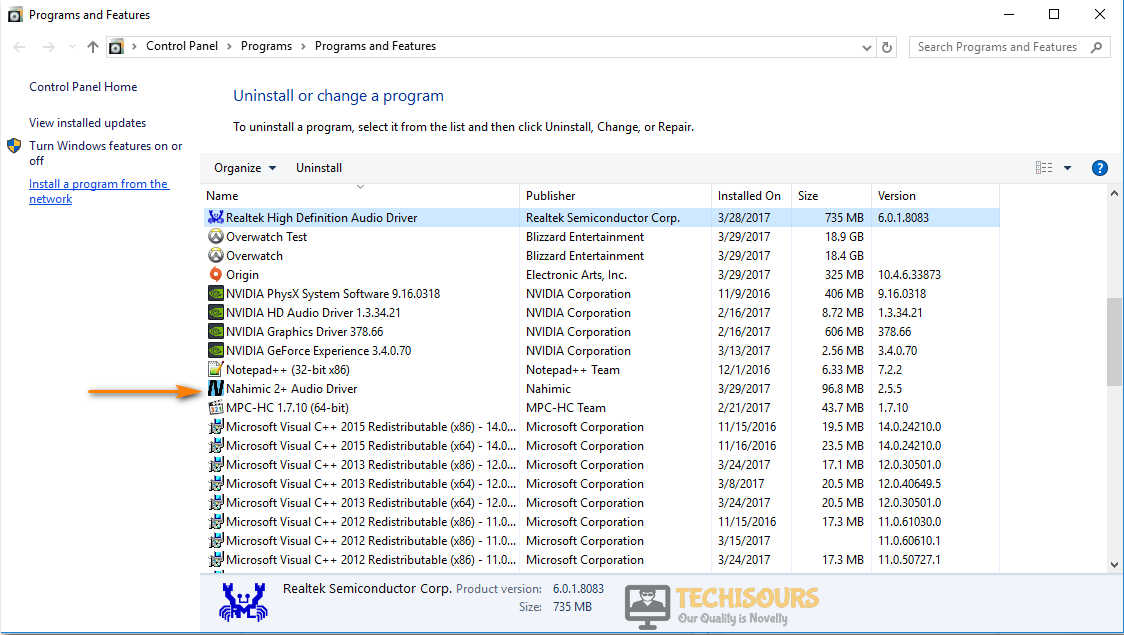
- In the following window scroll down through the list of applications to find “Nahimic” and once found select Nahimic to click on the “Uninstall” button.

Uninstall Nahimic Application - Then follow the on-screen instructions to uninstall Nahimic and afterward check to see if the error got eradicated.
Solution 6: Check OBS Audio Track Settings
Sometimes your audio and video from the same clip are saved in different locations, and when the audio is deleted for some reason, it results in no audio in the whole clip. So in order to check your OBS track settings follow these steps:
- Launch “OBS” from your desktop and click on the “Settings” button in the bottom left.
- Afterward, select “Output” from the left vertical bar, and in the Output menu select “Recording”.

Choose the Recording Option - Now make sure you have selected the same tracks for recording and then see if you got rid of obs not recording audio headphones error.
Solution 7: Update Your Audio Driver
You can try updating your audio drivers to help fix the issue. Follow these steps in this regard:
- In the search bar near the Start menu search for “Device Manager” and click to open it from the search results.

Typing Device Manager - Then expand the “Audio Inputs And Outputs” section using the arrow beside it.

Audio Inputs and Outputs - Now to update a device, right-click on it and then select “Update Driver” from the drop-down menu.
- In the next pop-up menu choose to select “Search For Drivers Automatically”, windows will then look for drivers on the internet, and if found it will be downloaded and installed automatically.
- Do this for all the devices inside the “Audio” section and afterward check to see if the error still persists or not.


Solution 8: Set Up Enhancements For Your Speaker
Playing with the Enhancements settings of their speakers, some users were able to solve their OBS issue:
- Open the “Sounds” settings by right-clicking on the “Speaker icon” on the “Taskbar” and then selecting “Sounds” from the drop-down menu.
- Then click on the “Playback” tab at the top and select the “Speaker” you want to enhance the audio for.
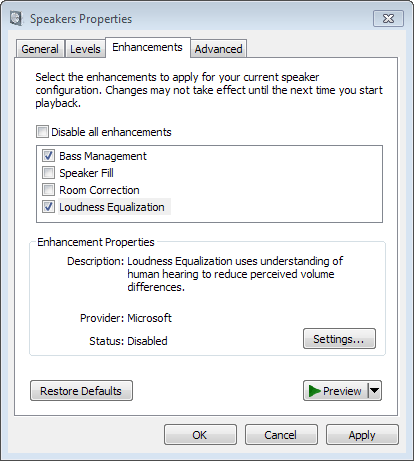
- Then click on “Properties” at the bottom and next click on the “Enhancements” tab in the new Properties window.
- Now in the Enhancements section check the boxes for “Bass Boost, Virtual Surround, and Loudness Equalization”.

Check the Loudness Equalization Boxes - Once done, Apply all the changes made and hit the “OK” button.
Solution 9: Disable GX In Xonar Sound Cards
The GX mode in Xonar sounds cards can interfere with OBS recording, thus, disabling it can benefit you. Also, GX mode can be disabled by going into your Sound Card software.
Solution 10: Re-install OBS Studio
If none of the solutions above work, you can try re-installing OBS studio on your computer. To do so you will have to implement these steps:
- Press the “Window + R” keys together on your keyboard to open up the “Run” wizard.
- In the Run dialog box type in “appwiz.cpl” and press “Enter”.

Typing “appwiz.cpl” - In the pop-up “Programs and Features” window scroll down through the list of applications to find “OBS Studio”.
- Click on OBS Studio and then select “Uninstall”.

Uninstall OBS Studio - Once the Studio is uninstalled, you can download the latest version of “OBS Studio” from their official website.


Solution 11: Use An Alternative Audio Application
If re-installing the studio doesn’t work as well, you can try using an alternative application for audio recording. I this aspect Adobe Audition is recommended, it is known among the best audio recording software for Windows. Also, it offers a large variety of features and you can add your own commentary in the process.
Solution 12: Set Both Audio To Default
- Launch the “OBS Studio” and click on “Settings” in the bottom right corner.
- Then select “Audio” in the left vertical tab and in the “Devices” section set “Audio 1” to “Default” using the drop-down menu.
- Now set “Audio 2” to “Default” as well.

Setting Both Audio’s to Default - Apply all the changes made, click on “OK” to check whether obs not recording audio from game issue is rectified.

Solution 13: Set the Appropriate Device Instead Of Default
If setting the audio devices on default does not solve the issue try setting “Audio 1” and “Audio 2” to the device you want. Proceed with the below-mentioned steps:
- Launch “OBS Studio” and click to select “Settings”.
- Then select “Audio” from the left pane and set “Audio 1” to the device you wish to use.
- Also, set “Audio 2” to the same device as well, and afterward set your “Mic” to the device underuse.
- Apply all the changes made and click on “OK”.
- Lastly, check to see if it helped you get rid of the error.
Carry out the list of solutions indexed above to remove the error completely but if the issue still exists then feel free to Contact Us here and we’ll further look into it for you.