Fixes
How to Fix Local area connection doesn’t have a valid IP Configuration issue on Windows?
Devices communicate over the internet using an internet protocol (IP) address. But sometimes you observe an error message saying “Local area connection doesn’t have a valid IP configuration”. This error occurs when your ethernet connection cannot be assigned an IP address from the Dynamic Host Configuration Protocol (DHCP) and thus you are unable to access the internet. Therefore, we have compiled a set of recommended fixes and solutions to resolve this issue.

What causes the error “Local area connection doesn’t have a valid IP configuration”?
Following are some of the major causes which trigger this error:
- TCP/IP Settings: Sometimes the issue arises due to corrupted TCP/IP settings and resetting TCP/IP manually might simply eradicate this error.
- Antivirus Software: This issue might also be caused by the presence of any sort of antivirus program on your PC. Simply disable the software for a while and check whether this helps in fixing the issue.
- Network Adapter Drivers: Sometimes incorrect or faulty network adapters can also cause network connectivity problems. This error can be fixed by updating or reinstalling network drivers.
Pre Tips:
- Restart Your PC: Shut down the Windows operating system and restart your PC again. Then see whether the issue “Local area connection doesn’t have a valid IP configuration” is fixed or not.
- Restart The Router: Unplug the router/modem from the main power plug and leave it unplugged for some time. Then plug it back and turn on your PC. Now check whether the issue “Local area connection doesn’t have a valid IP configuration” is fixed or not.
What to do if you get the “Local area connection doesn’t have a valid IP configuration” error?
Try the following recommended fixes in order to eradicate this issue:
Solution 1: Make Alterations In Network Connection
- From the taskbar right-click on the network icon. Then select Open network and sharing center.
Network And Sharing Center - Click change adapter settings. Then click on the network adapter you are using and select properties.
Adapter Settings Select Properties - Now click configure.
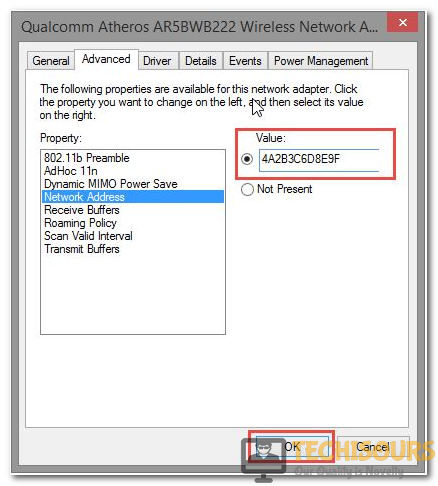
Configure - Highlight the property Network Address from the Advanced Pane. Then configure its value to be a random 12 alphanumeric characters. Then click ok.
Network Address - Check if you can connect to the network now.
Solution 2: Reinstall The Network Adapter Driver
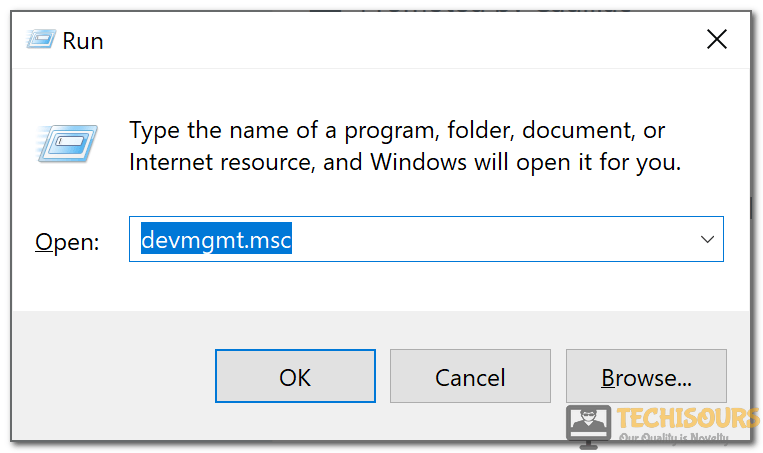
- Press windows+R key on your PC to open the run box. Then type the following command and click ok:
devmgmt.msc
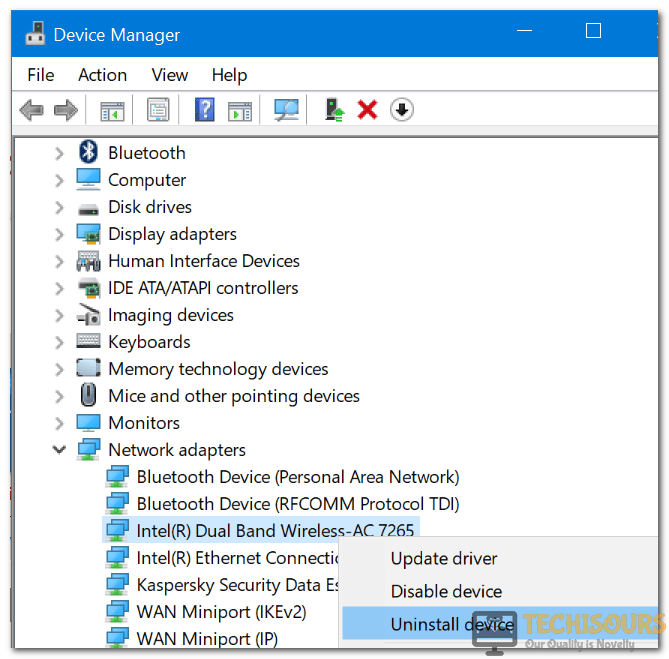
Command - Find the network adapters option from the catalog. Right-click on your specific adapter and choose to uninstall the device.
Network Adapters - Move to the manufacturer’s website of the network adapter and install the latest driver for it.
Solution 3: Modify Network Adapter Settings
- From the taskbar right-click on the network icon. Then select Open network and sharing center.
Network And Sharing Center - Click change adapter settings. Then click on the network adapter you are using and select properties.
Adapter Settings Properties - Then select Internet Protocol Version 4 (IPv4).
Internet Protocol Version 4 - Click to check the “Obtain an IP address automatically” and “Obtain DNS server address automatically” boxes.
IPv4 Properties - If they are checked already then select “Use the following IP address” and “Use the following DNS address services”.
IPv4 - Now click ok to save your settings and see if the issue gets fixed or not.
Solution 4: Modify the TCP/IP Settings
- Open the command prompt from the search window and right-click on run as administrator.
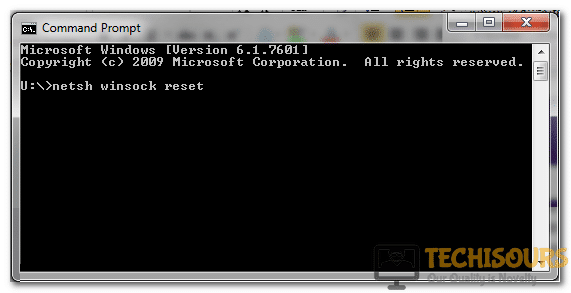
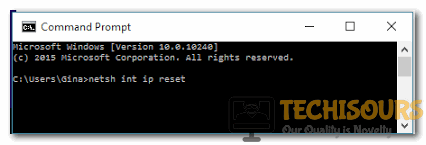
- Then type the following commands one by one respectively in the command prompt window and press enter:
netsh winsock reset
netsh int ip reset
Command Prompt Command Prompt - Next, restart your PC after quitting from the command prompt window and check if the problem is solved.
Solution 5: Disable the Antivirus
- Sometimes antivirus software installed on your PC can also be a cause of this error. Simply disable it for a while and check whether the problem settles or not.
- If yes, try downloading any other antivirus security program from the internet.
If you need further assistance click here.


