How to Fix Facebook keeps Crashing [Complete Guide]
Facebook, just like many other social media platforms, is one of the most liked and trending applications among its users that provides a range of features from sharing photos, videos, or connecting with friends and family online. It has become one of the largest social networking platforms in the world today. But despite its virtue, many of its users keep facing some operational difficulties, one of which will be discussed in this article.

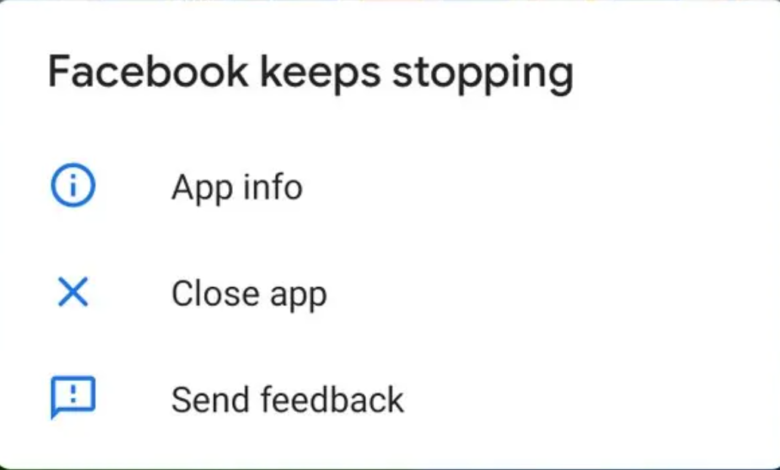
Facebook may keep crashing or freezing on your device and there are numerous reasons behind this including a poor WiFi connection, lack of storage, or an outdated application etc. This article will give you a detailed insight of how you can overcome this error on your device and keep running Facebook smoothly. Just walk through the tips and tricks mentioned below in detail and implement them carefully on your device to help overcome facebook keeps crashing error.
Why Facebook keeps crashing on PC?
- Poor Network Connection: This could be a primary reason why your Facebook app keeps crashing. If you don’t have a stable and smooth internet connection it will most likely lead you to encounter facebook keeps crashing on pc error.
- Insufficient Device Storage: If your device has limited storage space available, it can affect the performance of many apps including Facebook.
- Corrupted App Data/Cache: Overtime, the accumulated app data/cache can become corrupted leading to app crashes. So, clearing the app cache is also necessary for its normal functionality.
- Device Performance Limitations: The low-end devices with minimum processing power may also struggle with such issues. If you try accessing Facebook on such a device, it’s better to close the background applications or upgrade it to a more capable and better device.
- Server Issues: Facebook app may also crash sometimes due to server-related issues. But this bug is temporary, and you can try again later after some time.
Before You Start:
- Reopen the Application: This is a simple and quick fix in which as soon as you encounter the crashing issue, just quit from the application and then reopen it after some time. Doing this will refresh your data and may fix the problem instantly.
- Restart Your Device: A simple restart can fix many of the technical issues on your device. Therefore, shut down your device completely and then restart it again to see if the error got solved. To restart your phone, follow the steps below:
i: Locate the “Power” button on the side of your mobile phone and press and hold the button for a while until a “Menu” appears up on your screen.
ii: On the menu screen locate and select the “Restart” or “Reboot” option.
iii: A pop-up message may appear to confirm your selection, click to select the “Confirm” button.
iv: Now wait for your device to first turn “OFF” and then “ON” automatically, and finally open Facebook again to see if the problem got removed. - Switch To Mobile Data: Sometimes your internet connection may also get weak and lead to various glitches so try switching to mobile data and see if it helps solve the problem.
- Try Accessing Facebook Through Web Browser: If you’re experiencing Facebook app issues just like this one you can always opt to access Facebook through its official website using an internet browser. The website is optimized to work well and is a reliable alternative to mobile phones, tablets etc.
- Quick Fix: Another helpful tip if you are able to access Facebook even for a shorter period of time before it really crashes is that open the application and quickly select the “Menu” icon from the top-left corner to select your timeline. Once it gets loaded fully, you can now access the app without any issues.
- Check Facebook Server Status: There could be some ongoing issues in the Facebook platform itself which may lead to this error, so you also need to check the Facebook status and confirm if it isn’t down. Just go to the official website of Facebook and see if it loads, if it does and your app still crashes move to other detailed fixes listed below.
Fixing the Facebook keeps crashing issue completely:
Fix 1: Update the Facebook Application
In order to update the application, follow the steps below:
- Grab your mobile and open the “App Store” specific to your device’s operating system. For iOS devices it will be “App Store” while for Android devices it is the “Google Play Store”.
- In here search for the “Facebook” application in the search bar and click to open it.
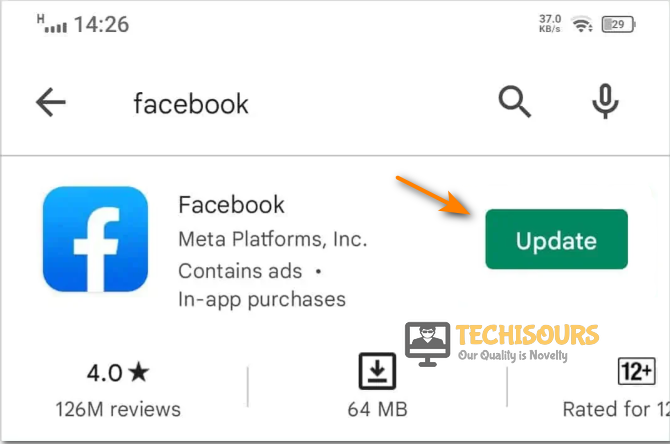
- If you have the Facebook app already installed on your device and a new version is available, you will see an “Update” button next to the app.
- Tap on the “Update” button and enter your necessary credentials (if asked) to initiate the update.
Updating Facebook Application - Now wait for the update to download and install automatically on your device.
- Finally launch the updated app and check to see if the error got solved.
Fix 2 : Update Your Device’s Software
In order to install the latest updates on your device proceed with the method below:
Windows OS Users:
- Press the “Window + I” keys simultaneously on your keyboard to open the “Settings” window.
- In the pop-up tab click on the “Update & Security” option and then select “Windows Updates” option from left panel.
Clicking on Update and Security - Then select “Check for Updates” and wait until the system checks for latest available updates.
Clicking on Check for Updates option - Finally press the “Download & Install” button to install the latest updates on your computer.
- Once the system gets updated now proceed to check if facebook keeps crashing on pc error got settled.
Android Users:
- Open your mobile, search for “Settings” in the search bar and click to open it.
- From here scroll down to locate the “About Phone” option and click to select it.
Choose About Phone Option - Then select “Software Update > Check for Updates” options respectively.
Checking for Updates on Android - Your device will now check for any latest updates available and will install them automatically on your system and once the process is complete then proceed to verify if the issue got solved.
iOS Users:
- Firstly, ensure that your iOS device is connected to a strong and reliable internet connection as software updates can be pretty much large and will require a stable network connection.
- Before installing the updates its necessary that you perform a backup on your device. To do so proceed as: “Settings -> Your Name -> iCloud -> iCloud Backup -> Backup Now”.
- Next locate the “Settings” app on your phone and click to open it.
- Here scroll down the Settings menu to locate and click on “General”.
Clicking on General Option - In the following window look for “Software Update” and tap on it.
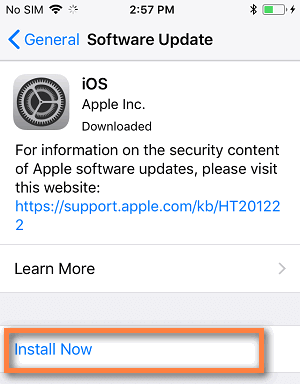
- Your device will now start checking for any latest updates available and if so, you will be prompted with an “Install Now” icon. Hit the button to begin the update process.
Installing Updates on iPhone - Next follow the on-screen instructions and put in the necessary credentials to completely download the available updates.
- Once downloaded you will now be prompted to install the updates. Tap on the “Install” button to begin the installation process.
- Finally follow the on-screen instructions to complete the update process.
- Now your device will be running the latest version of iOS, check to see if this helped in resolving facebook keeps crashing iphone error.
Fix 3: Switch To a Wired Connection
If you are using a cellular network for internet connection the signals may get weak over time so try switching to a wired WiFi connection for strong and stable internet signals. After switching your network connection try opening the Facebook app now and see if the facebook keeps crashing error got solved.
Fix 4: Disable VPN
Using a VPN service can sometimes introduce network instability, which can cause issues in the smooth functionality of an application. Therefore, if you are currently using a VPN, it is recommended to disable it and then try accessing Facebook.
Fix 5: Disable 5G
If your device is connected to an unstable 5G network it can lead to congestion issues on the network so either try disabling it or switch to another network mode for smooth operation of Facebook. In order to turn “OFF” 5G on your device follow the steps below:
- Pick up your device (Android or iOS) and click on the “Settings” option.
- Here look for “Network & Internet” or “Connections” option from the menu and click to open it.
Choose Network & Internet Option - You may either need to select “Mobile Network” or “Cellular Networks” depending upon your device.
- In the following window check for the option related to 5G connectivity, such as “5G” or “5G/LTE/3G/2G/Auto”.
Look for 5G Option - Toggle the switch next to the 5G connectivity to turn it “OFF”.
- This will take a few seconds to process, once done now open Facebook again to see if the error persists or not.
Fix 6: Free More Storage on Your Device
This solution will take you through freeing up some space on your particular device be it an iOS, Android or Windows OS:
iOS Users:
There are a number of ways that you can utilize to free up adequate space on your device effectively including deleting the unnecessary applications, managing media storage, reviewing and deleting large files, removing offline content, deleting old messages, clearing cache and data, or enabling iCloud storage optimization. Here we will demonstrate a simple and quick way to free up space on your iOS device:
- Open your iPhone, locate and select the “Settings” option.
- In the Settings window scroll below to locate and click on “General”.
Clicking on general - In the General tab click to select “iPhone Storage”.
- In the following window go through a list available under “Recommendations” section to select one or more options to free up space on the iPhone. You can pick and finalize from several options ranging from offload unused apps, music, large attachments etc.
- Once you’ve done freeing up space on your device now proceed to check if the problem got fixed.
Android Users:
Like iOS there are several methods to free up space on Android as well which include clearing app cache, deleting unused apps, moving apps to SD card, managing media files, deleting old messages and conversations, or enabling cloud storage. There is a built-in tool in android that will delete the unused apps and downloaded files, photos, and videos that you have backed up online. In order to free up space using this follow the steps listed below:
- Open your Android phone and go to “Settings”.
- In the Settings window navigate to select “Storage”.
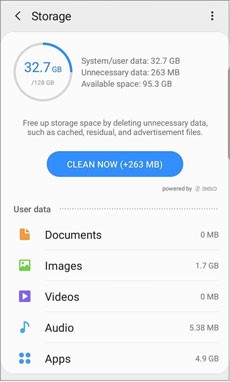
Clicking on Storage Option - Then in the following window tap to choose “Clean Now” or “Free Up Space”.
- Next select the items you want to delete and again tap on “Clean Now” or “Free Up Space”.
Clearing Storage - Finally, when you’ve created space on your device now check whether facebook keeps crashing android issue persists or not.
Windows Users:
To free up space on your Windows PC, you can perform a disk cleanup, uninstall unused programs, delete temporary files, clear browser update, remove unnecessary files and folders, or move files to external storage. Proceed with the below-listed method in order to create space on your Windows PC:
- Open your desktop PC, go to the “Start” menu, type in “Settings” here and click to open it.
- In the Settings window proceed to select “System”.
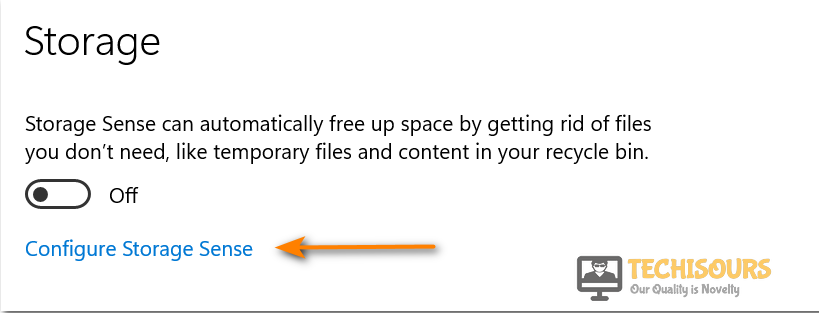
- Then select “Storage” from the left pane and afterward select “Configure Storage Sense” option.
Clicking on Configure Storage Sense Option - In the following window make sure that the toggle button next to “Storage Sense” is enabled.
- Then navigate below to find the option of “Clean Now”, click to select it.
- The scan will begin immediately, and Windows will scan the computer to find the files that can be removed to free up the disk space.
- When the process is complete then verify if the facebook keeps crashing on pc issue got resolved successfully.
Fix 7: Tweak Your Phone Settings Temporarily
The Facebook app may encounter frequent crashes depending upon your phone settings including battery usage restrictions, app permissions, and data restrictions etc. Try to disable the battery saver temporarily or add Facebook to the whitelist to prevent any malfunctioning.
Fix 8: Turn Off Low Data Mode On iPhone
If you disable low data mode on your iPhone it will no longer restrict the data usage for apps and services allowing them to utilize normal data usage. In order to disable the low data mode on your iPhone follow the steps below:
- Grab your iPhone, locate the “Settings” option and click to open it.
- Scroll down the menu and tap on “Cellular” or “Mobile Data”.
Clicking on Mobile Data Option - In the following window find the option of “Low Data Mode” and click on it.
- Next toggle the button in front of Low Data mode to turn it “OFF”.
- Now exit the Settings window and check to see if the facebook keeps crashing iphone issue got resolved.
Fix 9: Restrict the Background Applications
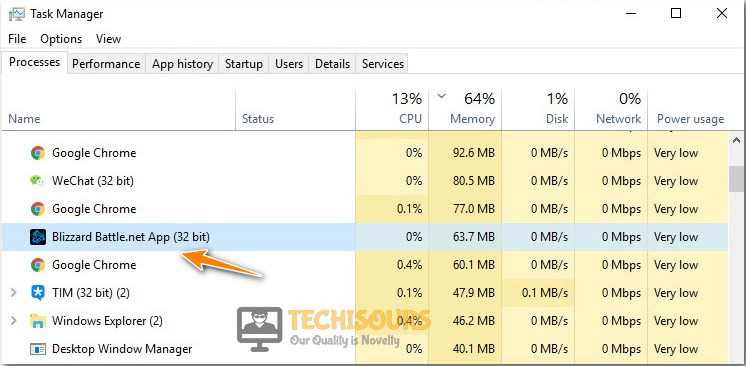
Tasks running in the background can also cause Facebook to crash and as a result, generate this error. So, try restricting the background activity of your device (mobile, tablet, PC etc.) in order to clear up some RAM and eradicate this error. If you are using Facebook on your Windows PC follow the steps below to disable the background processes:
- On your PC type “Task Manager” in the search bar and click to open it.
- In the pop-up window go to the “Processes” tab which will show you a list of tasks running in the background.
Ending Background Processes - Then right-click on all the unnecessary tasks and select the option “End Task”.
Fix 10: Clear App Cache & Cookies
Clearing the Facebook cache removes data that is being stored in the background and is a straightforward and effective step in the smooth running of your application. Follow the steps below to clear your app cache and cookies:
- Open the Facebook application on your device and tap the “Menu” icon in the bottom-right corner of the screen.
- From the pop-up menu select “Settings & Privacy”, and then tap on the “Settings” button.
Clicking on “Settings and Privacy” Option - Next locate the “Permissions” section and tap on “Browser”.
- Under the “Browsing Data” option, hit the “Clear” button to clear your app cache and check if the error got solved.
Fix 11: Clear the App Data
Follow the below-mentioned steps to clear the Facebook app data:
- Grab your mobile and click on the “Settings” icon.
- Then scroll the menu and choose “Apps & Notifications > Facebook”.
Choose All Apps Option - From the pop-up menu choose to select the “Storage” option.
- Next, tap on the “Clear Storage” option and click “OK” to confirm the prompt.
Fix 12: Reset Network Configuration
Resetting your network settings will remove all of your saved WiFi networks, and other network related settings. But several glitches that you are facing across multiple apps and websites can successfully be removed by doing so. Follow the below-mentioned procedure to implement this fix:
Android Users:
In order to reset network settings on android carry out the following steps:
- Grab your mobile and open the “Settings” application on it.
- Scroll through the menu to locate the option of “System” or “System & Device”.
- Here look for the “Reset” option among the list and click to select it.
- In the following tab click to choose “Reset Network Settings”.
- In this tab select “Reset WiFi, Mobile & Bluetooth” or a similar option.
- At this point you may be prompted to enter your “Device PIN” to proceed towards the confirmation. Enter all of the required credentials and tap on “Reset Settings” or a similar option.
- Your device will now reset the network settings to the default configuration.
- Once completed now you might need to reconfigure any necessary network settings and afterward check to see if the error got settled.
iOS Users:
Follow the below-mentioned procedure to reset the network configuration on your iOS device:
- Open your phone and tap on the “Settings” option.
- Scroll down the list to locate and click on “General”.
Clicking on General Option - Again, scroll down the menu and tap on the “Reset” option.
- In the pop-up window click to select “Reset Network Settings”. At this point you might be prompted to enter your login credentials.
Click on Reset Network Settings Option - Next tap “Reset Network Settings” to confirm your selection.
- Your device will now “Restart” and will reset the network settings to the default configuration.
Fix 13: Grant Permissions to Facebook
If in your phone settings certain permissions to Facebook are disabled it may lead towards abnormal functionality of Facebook. In order to grant permissions to Facebook follow the steps below:
- Open your phone, locate the “Settings” application and click to open it.
- Here select “Apps” -> “Manage Apps” which will display all of the installed applications on your phone.
Choose Manage Apps and Devices Option - Select the “Facebook” app from the list and then tap to select “Permissions” of this app.
- Here you will see the permissions that you have enabled and disabled to Facebook. Simply try to “Enable” the not allowed permissions and then proceed to check if the error got settled.
Fix 14: Synchronize Your iPhone with iTunes
This is another potential fix to come over this error. Try to sync your iOS device with iTunes through your computer. By syncing with iTunes, you have the opportunity to update your iOS software to the latest version and also have the option to back up your data either to the cloud or your computer.
Fix 15: Empty Your Device Memory
This is an optimal fix to many techs related errors as a low memory device can cause hindrance in the normal functioning of an application. Firstly, you can check up on your device storage and if you are running low on it simply try to uninstall unused applications, delete some photos or music, clear app cache, or transfer files to external storage.
Fix 16: Reinstall the Facebook Application
Sometimes a corrupt Facebook application can also give rise to this error so as a try reinstalling the Facebook application on your device. Firstly, uninstall Facebook from your device, and then go to App Store (iOS) or Google Play Store (Android) to download and reinstall the application. Follow the on-screen instructions to complete the installation process smoothly.
Fix 17: Perform A Factory Reset
Performing a factory reset will erase all of your existing data and will restore it to the default settings. So, make sure that you back up all of your important data including any contacts, photos, videos etc. and then perform the reset as mentioned in the steps below:
- Open up your Android phone and click to open the “Settings” option.
- Here find “System” or “System & Device” section.
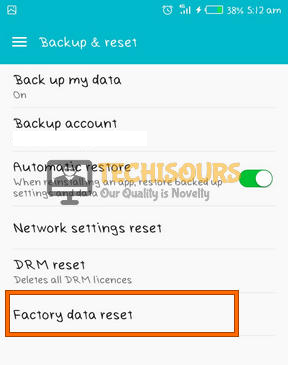
- In the System settings window navigate to find “Reset” or “Backup & Reset” option and click to select it.
- In the following window locate and select “Factory Data Reset”.
Choose Factory Data Reset Option - Now a pop-up message will appear, here click to “Confirm” the reset.
- Then follow the on-screen instructions to complete the process smoothly and finally check to see if the error has been removed.
Fix 18: Download the Facebook Lite Application
If you are still not able to solve the error then you can always switch to another application quite similar to Facebook called Facebook Lite. Facebook Lite is a lightweight version of the Facebook app designed for users with slower internet connections or less powerful devices. Just head to the Play Store and download the application from there which offers the exact same features as Facebook does.
Fix 19: Report the Issue to Facebook
If none of the aforementioned fixes helped you get through the error then try reporting your problem to Facebook. To do so proceed as follows:
- On your computer log onto your “Facebook” account.
- In the pop-up window click to select the “Menu” button represented by three lines icon in the top-right corner of the screen.
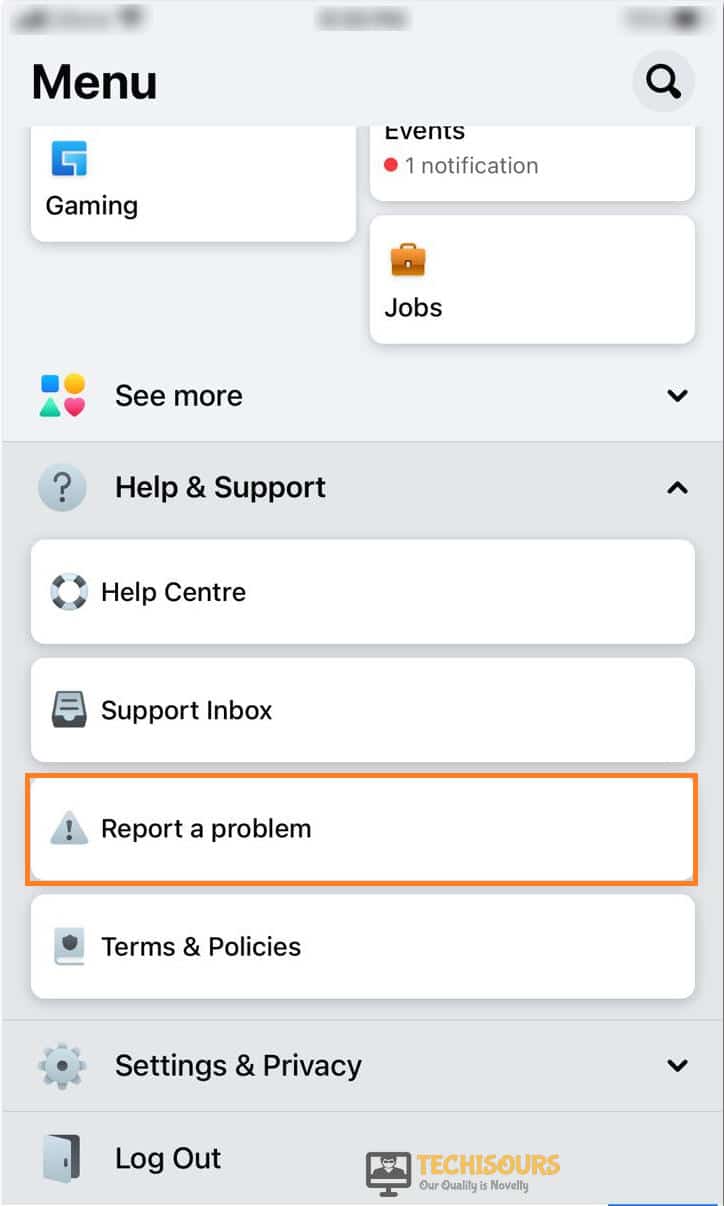
- In the next tab locate and select the “Help & Support > Report a Problem” options respectively.
Reporting a Problem to Facebook - Next follow the on-screen instructions to complete the steps smoothly.
If the issue still isn’t fixed, you can feel free to contact us for further troubleshooting.
